How to Achieve Perfect Laser Engraving Results on Different Materials
Laser engraving is a versatile technology that allows for incredible precision across a wide range of materials. However, the “perfect” setting for one material can be a disaster for another. To achieve professional results, you must understand how different materials react to laser energy and adjust your parameters accordingly.
In this guide, we’ll explore the best practices for engraving wood, acrylic, and metals to help you get consistent, high-quality results every time.
1. Engraving Wood: The Organic Challenge
Wood is one of the most popular materials for laser engraving, but its organic nature means results can vary by species.
Key Tips:
- Choose the Right Wood: Hardwoods like maple and cherry produce a high-contrast, dark engrave. Softwoods like pine can be resinous and may produce uneven results.
- Manage Smoke: Use a strong air assist to blow smoke away from the wood surface, preventing “smoke stains” or scorching around the engraved area.
- Grain Direction: Engraving with the grain usually yields smoother results than engraving across it.
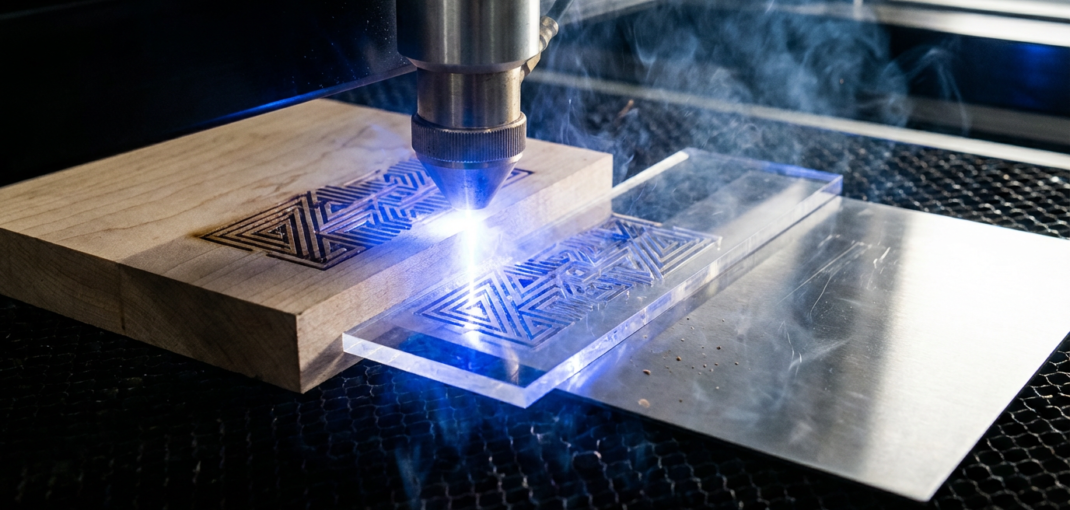
2. Acrylic: Achieving the Frosted Look
Acrylic is a laser-user’s favorite because it cuts and engraves beautifully. There are two main types: Cast and Extruded.
Key Tips:
- Use Cast Acrylic for Engraving: Cast acrylic turns a bright, “frosted” white when engraved, providing excellent contrast. Extruded acrylic remains clear when engraved, which is usually not the desired effect.
- Focus is Critical: A slightly defocused laser can sometimes produce a smoother, more even “fill” on large engraved areas.
- Cleaning: Always use a specialized acrylic cleaner or mild soap and water. Never use alcohol-based cleaners, as they can cause the acrylic to crack (crazing).
3. Metals: Precision and Permanence
Engraving metal typically requires a Fiber laser or a CO2 laser with a specialized marking compound.
Key Tips:
- Fiber Lasers: These are ideal for direct metal engraving. You can achieve different colors (from white to deep black) by adjusting the frequency and speed.
- CO2 Lasers with Marking Sprays: If you only have a CO2 laser, you can apply a marking compound (like Cermark) to the metal surface. The laser fuses the compound to the metal, creating a permanent black mark.
- Anodized Aluminum: This is the easiest metal to work with. The laser removes the anodized layer, exposing the silver aluminum underneath, creating a high-contrast mark.
General Parameter Guidelines
| Material | Laser Type | Suggested Approach | Key Parameter |
|---|---|---|---|
| Hardwood | CO2 | High Power, High Speed | Air Assist |
| Cast Acrylic | CO2 | Low Power, High Speed | Focus |
| Stainless Steel | Fiber | Medium Power, Low Speed | Frequency |
| Anodized Alum. | CO2/Fiber | Low Power, High Speed | Resolution (DPI) |
4. Fine-Tuning Your Results
Regardless of the material, always perform a Power/Speed Grid Test. Create a small grid of squares on a scrap piece of your material and vary the power and speed for each square. This will show you exactly which setting produces the best depth and contrast for that specific batch of material.
Conclusion
Perfect laser engraving is a combination of the right equipment, the right material, and the patience to test your settings. By understanding the unique properties of wood, acrylic, and metal, you can unlock the full potential of your laser machine.
Looking for replacement lenses or mirrors to keep your engraving sharp? Visit CNC Parts Market for all your industrial laser needs.