A Guide to Rotary Attachments for Laser Engraving Cylindrical Objects
Standard laser machines are designed to operate on a two-axis system (X and Y), moving the laser head across a flat, horizontal surface. While this is perfect for flat sheets of wood, acrylic, or metal, it presents a challenge when you want to engrave objects like tumblers, bottles, rolling pins, or flashlights. To engrave these curved surfaces accurately, you need a rotary attachment.
In this guide, we will explore the different types of rotary attachments, how they work, and tips for achieving perfect results on cylindrical objects.
What is a Rotary Attachment?
A rotary attachment is a mechanical device that replaces or supplements one of your machine’s axes (usually the Y-axis). Instead of the laser head moving back and forth across a flat bed, the rotary attachment rotates the object itself. This rotation allows the laser to maintain a consistent focal distance as it “wraps” the design around the circumference of the item.
Types of Rotary Attachments
There are two primary designs for laser rotary attachments, each suited for different types of objects.
1. Roller Rotary Attachments
Roller rotaries consist of two or more parallel rollers that the object sits on.
- How it works: Friction between the rollers and the object causes it to spin.
- Best for: Standard cylinders like wine bottles, tumblers, and rolling pins.
- Pros: Easy to set up; can handle objects of varying lengths.
- Cons: Struggles with lightweight objects or items with handles (like mugs) that might slip or be unbalanced.
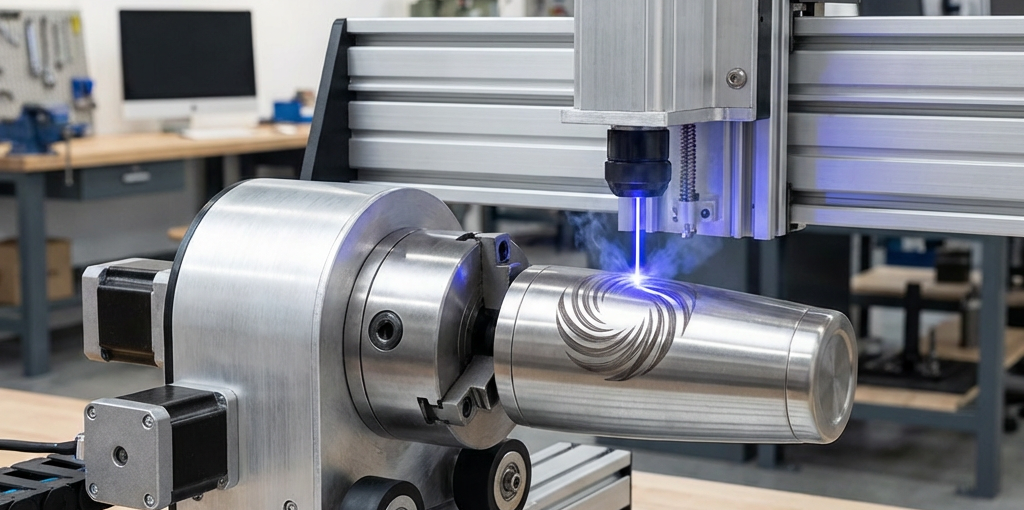
2. Chuck Rotary Attachments
A chuck rotary works similarly to a lathe, using a three-jaw or four-jaw chuck to grip one end of the object.
- How it works: The chuck is physically tightened around the base or the opening of the item.
- Best for: Irregular shapes, items with handles, and high-precision marking where slipping must be avoided.
- Pros: Secure grip; handles tapered or irregular objects better.
- Cons: Can be more complex to set up; may require more space within the machine’s work area.
Key Considerations for Setup
To get the best results with your rotary attachment, pay attention to these critical factors:
- Steps Per Rotation: Your laser controller (like a Ruida or GRBL-based board) needs to know how many motor steps equal one full 360-degree rotation. This setting is crucial for the design not to appear stretched or squished.
- Object Diameter: You must measure the diameter of your object and input it into your software (LightBurn or RDWorks). The software uses this to calculate the surface speed.
- Focusing: Curved surfaces have a narrow “sweet spot” for focus. Ensure the highest point of your object is perfectly focused. For larger designs that wrap far around the sides, you may need to adjust your focus slightly to account for the curve.
- Alignment: The rotary axis must be perfectly parallel to the laser head’s travel path. If it’s tilted, your engraving will appear slanted or spiraled.
Material-Specific Tips
- Glass Bottles: Apply a thin layer of dish soap or wet paper towel over the glass before engraving to prevent fracturing and achieve a smoother “frosted” look.
- Coated Stainless Steel (Tumblers): Use higher power and speed settings to “burn off” the powder coating and reveal the shiny metal underneath.
- Wood: Watch for grain direction. Rotating a wooden object can sometimes result in inconsistent depth if the grain density varies significantly.
Conclusion
A rotary attachment is one of the most versatile upgrades you can add to your laser setup. It opens up a massive market for personalized gifts, promotional items, and industrial marking. Whether you choose a roller or a chuck design, mastering the setup and calibration will allow you to produce professional, high-quality engravings on any cylindrical surface.
Looking for a high-quality rotary axis or other laser machine upgrades? Check out the selection at CNC Parts Market.